
The Xbox has become a crucial part of the gamers and gaming industry, alike. A brand created by Microsoft, it is one of the most popular consoles in the world. Microsoft released the first model in 2001 and became the best gaming console worldwide.
It is a splendid gaming hardware that one can connect with phones and PCs, making it an excellent product for different platforms. With its intense growth, the use of the Xbox controller became impressive. But like all technologies, it faces some issues as well.
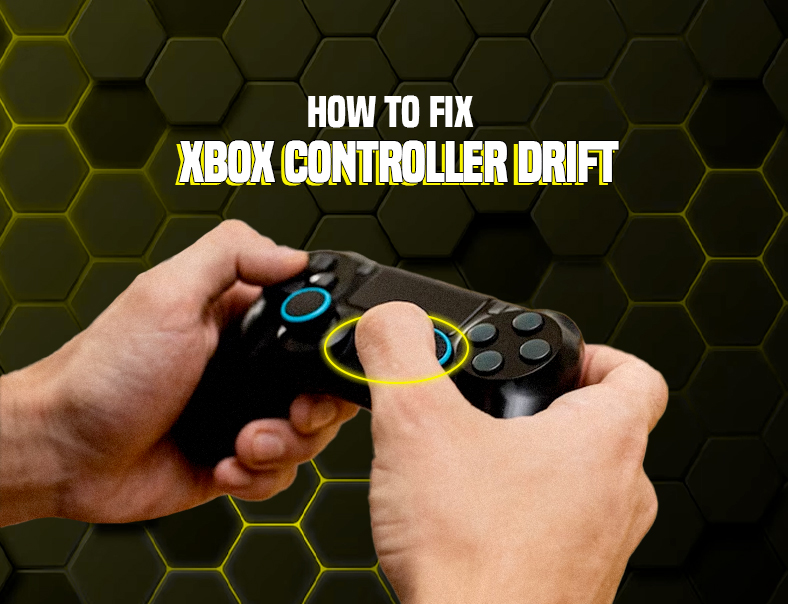
There are consistent complaints about the controller’s joysticks. The issue of stick drift is something to ponder upon as gamers have felt incredibly discouraged with it currently. It is a problem with first and third-person video games.
Hence, we tell you how to fix the Xbox controller drift issue.
Gamers, get ready and roll up your sleeves!
Understanding Xbox Controller Stick Drift
Imagine an avid gamer enjoying an intense online multiplayer match on the Xbox console. They are performing precise movements and executing swift actions in the game. However, during a critical moment, the character suddenly moves to the left without the player’s input. The struggle to regain control is intense, but the stick drift persists, causing missed crucial shots and ultimately costing the entire match!
The frustration and bewilderment regarding the once-reliable controller are plagued by stick drift. No one wants that!
The Xbox stick drift has been a recurring issue. It has put gamers into an infinite loop of disappointment. Before we jump into the various ways to fix it, let’s understand what stick drift is.
The Xbox controller stick drift occurs when one of the analog sticks on the controller starts moving automatically without the player touching it. This problem can make gaming experiences unplayable, as camera movements and in-game characters become erratic and unpredictable. It can happen for various reasons, so let’s delve into it.
Causes of Xbox series x controller drift
1. Wear and Tear
Over time, the mechanical components within the controller can wear out. The dust and debris may also cause interference and wear and tear. It may lead to inaccurate sensor readings and drifting. It is a common cause, especially for well-used controllers.
2. Physical damage
If you are a gamer, you know very well what the adrenaline rush and myriad of emotions while playing video games do to you. The Xbox series x stick drift may happen due to mishandling or dropping the controller. The internal components, including the analog stick, may lead to a drift.
3. Manufacturing Defects
In some cases, controllers may leave the factory with inherent defects, leading to Xbox series x controller stick drift. It is not so common but is quite disheartening when it happens. As a gamer, you can request customer service for repair or sue the company for faulty products.
These are just a few reasons for what causes stick drift Xbox. There may be several others, but the above are the primary causes. Take it to a professional or find a reliable solution that makes it right.
Introducing DriftAline Stick Drift Fixing Software
DriftAline boasts a rich history in the gaming industry. And thanks to its remarkable software, it offers a solution to address the issue of Xbox controller glitching. The software leverages vJoy as a virtual controller in conjunction with your physical controller.
There are specific steps you need to follow to use this software. There may be errors in setting it up, initially due to its exclusivity, but we think it will be fine later.
So let’s see how DriftAline can fix Xbox controller drift-
Download and Install DriftAlineTo Fix Stick Drift Xbox
Are you struggling with joystick drift on your Xbox controller and wondering how to resolve it? DriftAline software is your ultimate solution for tackling those persistent controller drift issues on your Xbox consoles. Our state-of-the-art technology empowers gamers to regain control and bid farewell to the frustrating problem of drifting joysticks.
Begin by downloading and installing the DriftAline software on your system.
Launch the Installer: Locate the DriftAline installer file you’ve downloaded and give it a double-click to initiate the installation process.
Blue Pop-Up Prompt: You might encounter a blue pop-up message during the installation. It is because the code signing certificate is in its initial stages. Rest assured, it’s safe to continue. Tap on “More Info” to continue.
Click the “Run” button- After selecting “More Info,” you’ll see the “Run the installer” message. Go ahead and click “Run” to kickstart the installation process.
1. Accessing the HidHide Configuration Client
The DriftAline installer window should open to start the installer. Then select the third-party tools to install. Select the vJoy component unless you already have it installed. It is critical as DriftAline uses vJOy for gaming interaction.
Now, let’s dive into the HidHide configuration process, a primary tool within DriftAline designed to address the issue of multiple connected controllers through the “HidHide\x64\HidHideClient.exe” path.
HidHide acts as a bridge, effectively resolving this issue. It is a specialized filter driver with the unique ability to “conceal” Gamepads and joystick devices. This clever feature ensures that Windows and other applications no longer recognize them as game controllers.
Doing this permits only designated applications to have visibility. This functionality becomes particularly valuable when users are engaged in the process of reassigning a genuine controller into an emulated one.
You need to add the path ending with “.exe” to DriftAline by clicking the plus button on the right and bottom corner.
2. Configuring Controller Visibility on the ‘Devices’ Tab
Once you have added the path, go to the devices tab and check the boxes with the controllers you want to hide. Be sure not to select vJoy, named ShaulEizikovichvJoy – Virtual Joystick. It is because you need to show vJOy to all gaming apps.
3. Enabling Device Hiding for Drift-Free Gaming
To achieve a gaming experience free from drift-related issues, follow these steps:
- At the bottom of the configuration client, locate and check the box labeled ‘Enable device hiding’.
- After enabling this feature, launch your game and savor the delight of a gameplay experience that’s completely free from controller drift.
One thing you ought to do before you start playing the game is to test it first.
4. Calibration and Testing
After successfully fixing the drift issue on your Xbox controller using DriftAline, it’s essential to perform calibration and testing to ensure optimal performance. Calibration fine-tunes the controller’s sensitivity and responsiveness, making it behave as good as new.
For instance, you can access the controller settings in your game and navigate to the calibration options. Follow the on-screen instructions to perform the calibration, which may involve centering the thumbsticks and testing button responsiveness.
Once completed, proceed to test the controller in your preferred game. You will notice a remarkable difference as the controller responds precisely to your input. It will ensure a seamless gaming experience without any unwanted drift interfering with your gameplay.
5. Common Troubleshooting Issues
While addressing Xbox controller drift issues with DriftAline, you might encounter some common troubleshooting scenarios-
- Driver compatibility- When trying to fix controller drift Xbox, ensure that your Xbox controller drivers are up to date and compatible with the DriftAline software. Updating your controller’s drivers or DriftAline might resolve the problem if you encounter issues.
- Reinstalling vJoy- If vJoy is not functioning correctly, consider uninstalling and then reinstalling it. Occasionally, conflicts with other software or outdated versions can cause problems.
Configuring Sensitivity- In some cases, you might notice overly sensitive or unresponsive controls after fixing drift. Adjusting the sensitivity settings in both the game and DriftAline can help fine-tune the controller’s behavior to your liking. - HidHide Configuration- Double-check your HidHide configuration settings. If not configured properly, it may lead to unintended issues with controller recognition in various applications. If there are issues, contact the Diftaline team to come to a solution.
- USB Connection- Ensure that you have properly connected the Xbox controller to the USB and that the cable is in good condition. Faulty USB connections can lead to connectivity problems.
- These were some common troubleshooting scenarios. You need not worry much as they are fixable. If you address them timely, you can effectively tackle any lingering issues and enjoy a drift-free gaming experience.
You should contact DriftAline for further assistance if you still find persisting issues. Their assistance is not just limited to Xbox consoles but PS4 controller drift too.
Common Tips To Fix The Stick Drift for Xbox Controller
While the above solution is based on software installation, there may be something else that may cause controller drift. If the DriftAline software does not work for any unknown reason, here are a few other processes you can try implementing. These are DIY tips for you so tread carefully as much as possible-
1. A Light Push and pull on the Joysticks
You can try to gently manipulate the affected joystick in various ways to fix Xbox stick drift. You can gently push the stick in all directions while it’s in a neutral position. It can sometimes dislodge debris or recalibrate the joystick’s sensors.
Press the joystick down when in a neutral position until you hear or feel a click. It can help reset the internal components. You can try pressing the base of the joystick with your finger.
It might reposition the internal mechanisms and temporarily alleviate the drift issue. Gently pull the Xbox One joystick upwards and click it back into place. It can help correct the joystick’s position.
2. Replace the Batteries
When encountering stick drift, low battery power can often be the culprit. To address this issue, dispose of the old batteries and insert fresh AA batteries into your controller.
An alternative, eco-friendly option is to utilize a rechargeable battery pack.
Charge the controller until it reaches full power. It is to ensure uninterrupted gameplay and resolve any potential stick drift problems caused by low battery levels.
4. Resync your Xbox Controller
There may be connection issues with the controller when you fix the Xbox One controller joystick. For this reason, resyncing it would be good. It may reestablish the connection and fix the related problem. Here are the following steps to resync and fix a drifting Xbox One controller with the console.
- Push the “Connect” button located on the left side of the Xbox.
- Press and hold the “Connect” button on the top-right side of the controller’s center.
- Keep holding the controller’s “Connect” button until the Xbox button on the controller starts flashing.
5. Cleaning your Xbox Controller
Try cleaning it with canned air to fix the Xbox One controller drift. It will maintain its performance and prolong its life. Here, we provide you with the step-by-step technique to clean the controller-
- Turn Off the Controller- Ensure your Xbox controller is in power-off mode before you start cleaning it.
- Press Analog Stick in One Direction- Press one of the analog sticks however far it can go in one direction. It is to create space for the air to enter.
- Spray Compressed Air- While keeping the can of compressed air level, direct the nozzle towards the base of the analog stick on the opposite side. Make sure not to turn the can sideways, as this could introduce moisture into the controller.
- Move the Stick All-Around- Slowly roll the analog stick around while continuously spraying the base with compressed air. It will help dislodge any debris or particles that may be causing issues.
- Gently Move the Stick Up and Down- While spraying, try gently pulling the analog stick upward or pressing it down while also pushing it to one side. This movement can create space for the air to enter and dislodge any remaining particles.
- Follow the same process for the other analog stick.
6. Update the Xbox Controller
Updating your controller’s firmware can fix the Xbox One controller joystick drift. While we cannot guarantee that it will fix controller drift on the Xbox Series X or any model, it’s worth trying.
The process is straightforward. You need to connect your controller to the Xbox using a USB cable, then press the controller button to open the Guide. From there, go to the Settings tab, choose “Kinect and Devices,” select “Device and Accessories,” and navigate to “More Options.”
Finally, select “Firmware Version” and click on “Update Now.” It will initiate the firmware update process for your controller, which may help address any unwanted movements.
7. Change the Deadzone
A dead zone is an area where one can move the stick without any movement. If the joystick leans slightly on its own, expand the dead zone. It may prevent unwanted motions during gaming.
To adjust the dead zone settings for your Xbox controller, begin by pressing the Xbox button on your controller, which opens the Guide. From there, navigate to the Gear/Settings tab, select the “Settings” option, and click on “Kinect& devices.”
In the subsequent menu, choose “Devices & accessories,” where your controller is in the list. To access further adjustments, press the Menu button for your controller. Within the controller settings, select “Adjustments.”
Finally, you’ll be able to fine-tune your dead zone preferences using the slider bar labeled “Deadzone.” This process allows you to customize the controller dead zone to suit your gaming needs.
2. Repairing the Controller
Before attempting any physical repairs on your controller to address stick drift issues, find out if the Xbox One is under warranty. If standard troubleshooting methods fail to resolve the problem, disassembling the controller for repair will void the warranty.
If your controller is less than a year old, we advise you to contact customer care at Microsoft to inquire about the possibility of a warranty exchange. It will avoid any unnecessary costs or complications.
You can try to open the backside covers with the Torx screwdrivers and remove the faceplate and the joysticks. After that, remove the grey plastic holder situated on the left side and clean the joysticks.
Cleaning the joystick may solve the issue of Xbox series controller drift.
But there is another way to repair the controller on your own-
- To address persistent controller issues, consider disassembling the controller. Start by removing the backplate. If problems persist, continue to detach the faceplate and the rubber thumbstick from the modules.
- Then, carefully separate the controller boards from the backplate by gently prying the backplate. Use your fingernails or a flathead screwdriver if needed.
- Then tape the motors as loose with an electrical tape or something less sticky. You can then turn the controller without the motors flipping out.
- Remove the screws that are behind the motors by turning the controller.
- Shift the larger circuit board- the motherboard, forward, and rest it on the trigger buttons. Be cautious not to touch any metal components on the board. Put your index finger on top and your thumb underneath.
- Carefully wiggle it until you can take out the circuit board. Use the trigger buttons to keep the circuit board tilted towards you as you remove it.
- Rotate the black piece on the left side of the joystick module that’s causing issues. To do this, use a flathead screwdriver. If the joystick drifts upward, rotate it counterclockwise; if it drifts downward, you should rotate it clockwise.
- Make two or three complete turns. Then move the joystick gently within the module and turn the black piece a few more times. Repeat this process a couple of times to adjust it.
- It’s time to test the controller.
Testing Time
Once you’ve undertaken the necessary steps to fix the stick drift Xbox series X, S, or One controller, it’s crucial to test the controller’s performance thoroughly. Reassemble the joystick components and faceplate, reinsert the batteries, and initiate testing.
If you find that the controller functions correctly without any stick drift issues, proceed to reattach the screws. However, if the problem persists, consider exploring alternative solutions to rectify the issue.
Preventative Tips For Xbox Series Controller Drift
Maintaining and preventing stick drift on your Xbox controller is crucial to ensure a smooth and enjoyable gaming experience. Here are some detailed maintenance and preventative tips to help you avoid stick drift issues-
1. Regular cleaning-
Grime and debris can accumulate around the analog sticks, causing them to malfunction. Periodically, clean your controller with a can of compressed air or a soft brush to remove any particles. If you wish, you can open the controller (if you’re comfortable doing so) and clean the internal components with 70% isopropyl alcohol and a soft cloth. Ensure the controller is completely dry before reassembling.
2. Handle with Care-
We know you would laugh if we asked you to treat your controllers gently. After all, it’s all about the aggressive gaming spirit! Nevertheless, avoid dropping it or subjecting it to impact. Physical damage will lead to internal issues.
3. Proper storage-
Wouldn’t you want to increase the longevity of the console? To maintain it, store it in a clean and dust-free environment when not in use. Be mindful not to place any objects on top of it or in areas where it could accumulate dirt or grime.
4. Firmware Updates-
In every technology, updates are quite critical to use them smoothly. Keep your Xbox controller’s firmware up to date by connecting it to your Xbox or PC and following any prompted updates. These updates often include bug fixes and improvements that can help prevent issues like stick drift.
5. Avoid Third-Party Chargers-
This is a common act by many Xbox users. Using third-party chargers creates a problem for the controller. Stick to official Xbox charging cables or batteries. Using low-quality or third-party chargers can damage your controller over time.
Share the Load- If you possess several controllers, consider rotating their usage. This practice helps distribute the wear and tear evenly, preventing the overuse of a single controller and ensuring its long-term durability.
6. Check for Warranty Coverage-
Be aware of the warranty coverage for your controllers. If you experience stick drift or other issues, check if your controller is still under warranty. You should seek manufacturer support for a replacement or repair.
7. Invest in Thumbstick Covers-
Protect your expensive gaming consoles! Consider using thumbstick covers or grips to protect the analog sticks from dust and wear. These are relatively inexpensive and can extend the life of your controller.
8. Stay Hydrated, but be Cautious-
Gamers seldom stay aware of the time they invest in gaming. It’s not surprising that they often forget to eat and drink. So we suggest you stay hydrated but keep drinks and other liquids away from your gaming area. You do not want to cause damage because of them.
9. Seek Professional Help:
Sometimes, none of the above methods work. If you experience stick drift despite taking preventive measures, we suggest you seek professional services or purchase a new controller. In our expertise, attempting DIY repairs can further damage your controller if not done correctly.
You can extend the lifespan of your Xbox controller and minimize the risk of experiencing stick drift issues by following these tips. A well-maintained controller ensures a more enjoyable gaming experience and saves you from the frustration of in-game control problems.
Get Ready For An Uninterrupted Gameplay!
The gaming world is a fierce one. Players need complete control and precision no matter what. Any fault in the controller and all the fun and thrill get ruined. This experience is extremely annoying to the extent that players may throw away the gaming console!
And no one wants to go through that ordeal. That’s why knowing how to fix the stick drift Xbox series would be nice through DriftAline.
The DriftAline software proves to be invaluable. You get to fix the joystick on the Xbox One controller. With DriftAline, redirect your focus to honing your skills and relishing the gaming experience rather than grappling with technical glitches.
We trust that you now possess a comprehensive understanding of how to fix Xbox controller drift. By reaching out to DriftAline, you can bid farewell to frustration, guarantee uninterrupted gameplay, and preserve the sheer joy of gaming.
Let not a glitch-ridden controller cast a shadow over your gaming adventures. With us, you aren’t downloading software; you are investing in enjoyment. We guarantee that every gaming session unfolds seamlessly, with precision, and pure delight.
Frequently Asked Questions
Why is my Xbox controller drifting?
Stick drift can occur due to wear and tear on the joystick components. Over time, dust or debris may accumulate, leading to misread inputs. It’s also possible that the controller’s internal sensors are malfunctioning, causing involuntary movement.
Why does my Xbox controller keep looking up?
The upward drift may result from joystick wear or damage, causing it to register an upward input even when untouched. Calibration issues or software glitches may also be the reason that the Xbox controller keeps looking up.
How to fix stick drift on Xbox?
Knowing how to fix the Xbox controller moving on its own can be tricky for many. It would be better to show it to a professional who knows the technicalities of it. But if you choose to do so on your own, try using DriftAline software for a smooth function. If it doesn’t work, clean it, re-calibrate the controllers, replace parts, or do a different software update.